Chocolate-Topped Boston Cream Cheesecake
 Save
Imagine slicing into a creamy cheesecake and finding a soft vanilla cake layer, silky pastry cream, and glossy chocolate ganache waiting inside. That is the magic of a Boston Cream Cheesecake recipe. It takes the classic Boston cream pie idea and turns it into a rich, impressive cheesecake.
I love recipes like this because they look fancy without requiring pastry-school skills. You get several textures in one slice, but each component uses simple techniques. Yes, you will dirty a few bowls. No, your kitchen will not need a Michelin star afterward. 🙂
Why You’ll Love This Boston Cream Cheesecake
This dessert combines everything I want from a special-occasion cake: creamy cheesecake, soft cake, smooth custard, and chocolate. The layers complement each other instead of fighting for attention.
The cheesecake brings tangy richness, while the pastry cream adds silky sweetness. The chocolate ganache finishes everything with a deep cocoa flavor that keeps the dessert from tasting overly sweet.
The best part? You can prepare the components ahead of time. That makes this cheesecake a practical choice for birthdays, dinner parties, holidays, and weekend gatherings.
Have you ever served a dessert that made everyone suddenly become very quiet? This one has that potential.
What Is Boston Cream Cheesecake?
A traditional Boston cream pie usually features sponge cake, pastry cream, and chocolate glaze. Despite its name, the classic dessert actually resembles a layered cake more than a pie.
A Boston Cream Cheesecake borrows those familiar flavors and adds a rich cheesecake layer. The result tastes familiar but feels more luxurious.
You will build the dessert with three main elements:
- A soft vanilla cake base
- A creamy cheesecake layer
- A smooth vanilla pastry cream
- A glossy chocolate ganache topping
That combination creates a dessert with contrasting textures in every bite.
Boston Cream Cheesecake Ingredients
For the Vanilla Cake Base
- 1 cup all-purpose flour
- 1 teaspoon baking powder
- ¼ teaspoon salt
- ½ cup granulated sugar
- ¼ cup unsalted butter, softened
- 1 large egg
- 1 teaspoon vanilla extract
- ⅓ cup whole milk
For the Cheesecake Layer
- 24 ounces cream cheese, softened
- ¾ cup granulated sugar
- 3 large eggs
- 1 teaspoon vanilla extract
- ½ cup sour cream
- 2 tablespoons all-purpose flour
For the Vanilla Pastry Cream
- 2 cups whole milk
- ½ cup granulated sugar
- 4 large egg yolks
- 3 tablespoons cornstarch
- 2 tablespoons unsalted butter
- 2 teaspoons vanilla extract
For the Chocolate Ganache
- 6 ounces semisweet chocolate, finely chopped
- ½ cup heavy cream
- 1 tablespoon unsalted butter
For the Pan
- Butter or nonstick spray
- Parchment paper
Servings: 10–12 slices
Prep time: 45 minutes
Bake time: 65–75 minutes
Chilling time: At least 6 hours
Total time: About 8 hours, including chilling

How to Make Boston Cream Cheesecake
Step 1: Prepare the Pan
Start by heating your oven to 325°F (165°C). Grease a 9-inch springform pan and line the bottom with parchment paper.
Wrap the outside of the pan with two layers of heavy-duty aluminum foil if you plan to use a water bath. The foil helps keep water away from the cheesecake during baking.
Why bother with the water bath? It creates gentle, even heat and helps the cheesecake bake with a smoother texture. Nobody wants a cheesecake that looks like it survived a minor earthquake.
Step 2: Make the Vanilla Cake Base
Whisk the flour, baking powder, and salt together in a small bowl. Set that mixture aside while you prepare the wet ingredients.
Beat the softened butter and sugar together until the mixture looks light and creamy. Add the egg and vanilla, then mix until everything blends smoothly.
Add the dry ingredients gradually, alternating with the milk. Mix just until the batter comes together.
Do not overmix the cake batter. Too much mixing can create a tougher cake, and we want a soft base that supports the creamy layers.
Spread the batter evenly into your prepared springform pan. Bake it for about 15–18 minutes, or until the center springs back lightly when you touch it.
Let the cake cool while you prepare the cheesecake mixture.
Step 3: Prepare the Cheesecake Filling
Place the softened cream cheese in a large mixing bowl. Beat it on medium speed until smooth and creamy.
Add the sugar and mix until it dissolves into the cream cheese. Add the eggs one at a time, mixing gently after each addition.
Stir in the vanilla, sour cream, and flour. Stop mixing once the filling looks smooth.
Room-temperature cream cheese makes a huge difference here. Cold cream cheese often leaves stubborn lumps, and those little lumps refuse to disappear no matter how aggressively you stare at them.
Pour the cheesecake mixture over the cooled cake base. Smooth the surface with a spatula.
Step 4: Bake the Cheesecake
Place the springform pan inside a larger roasting pan if you use a water bath. Carefully pour hot water into the roasting pan until it reaches about halfway up the cheesecake pan.
Bake for approximately 50–60 minutes. The edges should look set while the center should still have a gentle wobble.
Do not wait for the entire cheesecake to become completely firm in the oven. The cheesecake continues cooking from residual heat as it cools.
Turn off the oven and crack the door slightly. Let the cheesecake sit inside for about 30 minutes.
Then remove it from the oven and let it cool completely at room temperature.
Step 5: Make the Pastry Cream
While the cheesecake cools, prepare the pastry cream. Pour the milk into a saucepan and heat it over medium heat until it becomes hot but does not boil aggressively.
In another bowl, whisk the egg yolks, sugar, and cornstarch until smooth. The mixture should look pale and thick.
Slowly pour some of the hot milk into the egg mixture while whisking constantly. This step gently raises the egg temperature and helps prevent scrambling.
Pour the mixture back into the saucepan. Cook it over medium heat while whisking constantly.
Within a few minutes, the mixture should thicken into a creamy custard. Once it reaches that consistency, remove it from the heat.
Stir in the butter and vanilla. Transfer the pastry cream to a bowl and press plastic wrap directly against the surface.
Chill the pastry cream completely before assembling the cheesecake. Otherwise, warm custard can soften the cheesecake and create a messy layer.
Step 6: Chill the Cheesecake
Once the cheesecake reaches room temperature, cover it and refrigerate it for at least 4 hours. Overnight chilling works even better.
Why does chilling matter so much? Cheesecake needs time to firm up and develop its texture. A rushed cheesecake can crumble when you try to slice it.
FYI, overnight chilling also makes party-day preparation much easier. You can handle the decorating when your guests are still wondering whether you actually made dessert from scratch.
Step 7: Add the Pastry Cream
Remove the chilled cheesecake from the refrigerator. Carefully release the springform pan.
Spread the cold pastry cream evenly over the top of the cheesecake. Use an offset spatula to create a smooth, even layer.
Keep the pastry cream fairly thick rather than spreading it too thin. You want that creamy vanilla layer to show clearly when you cut the cake.
Place the cheesecake back into the refrigerator while you prepare the ganache.
Step 8: Make the Chocolate Ganache
Place the chopped chocolate in a heatproof bowl. Warm the heavy cream in a small saucepan until it becomes hot and begins to steam.
Pour the hot cream over the chocolate. Let the mixture sit for about two minutes.
Add the butter, then gently whisk until the chocolate melts into a smooth, glossy ganache.
Let the ganache cool for several minutes. You want it thick enough to spread but still fluid enough to create a smooth finish.
Step 9: Finish the Cheesecake
Pour the slightly cooled ganache over the pastry cream. Spread it gently toward the edges using an offset spatula.
You can create a completely smooth chocolate top or let the ganache form a few natural swirls. IMO, the slightly imperfect finish looks more homemade and inviting.
Return the cheesecake to the refrigerator for at least 1–2 hours before slicing.
Step 10: Slice and Serve
Run a sharp knife under hot water, dry it carefully, and slice the cheesecake. Clean the knife between cuts for neat layers.
Serve each slice chilled. You can add a few fresh berries or a small spoonful of whipped cream if you want extra decoration.
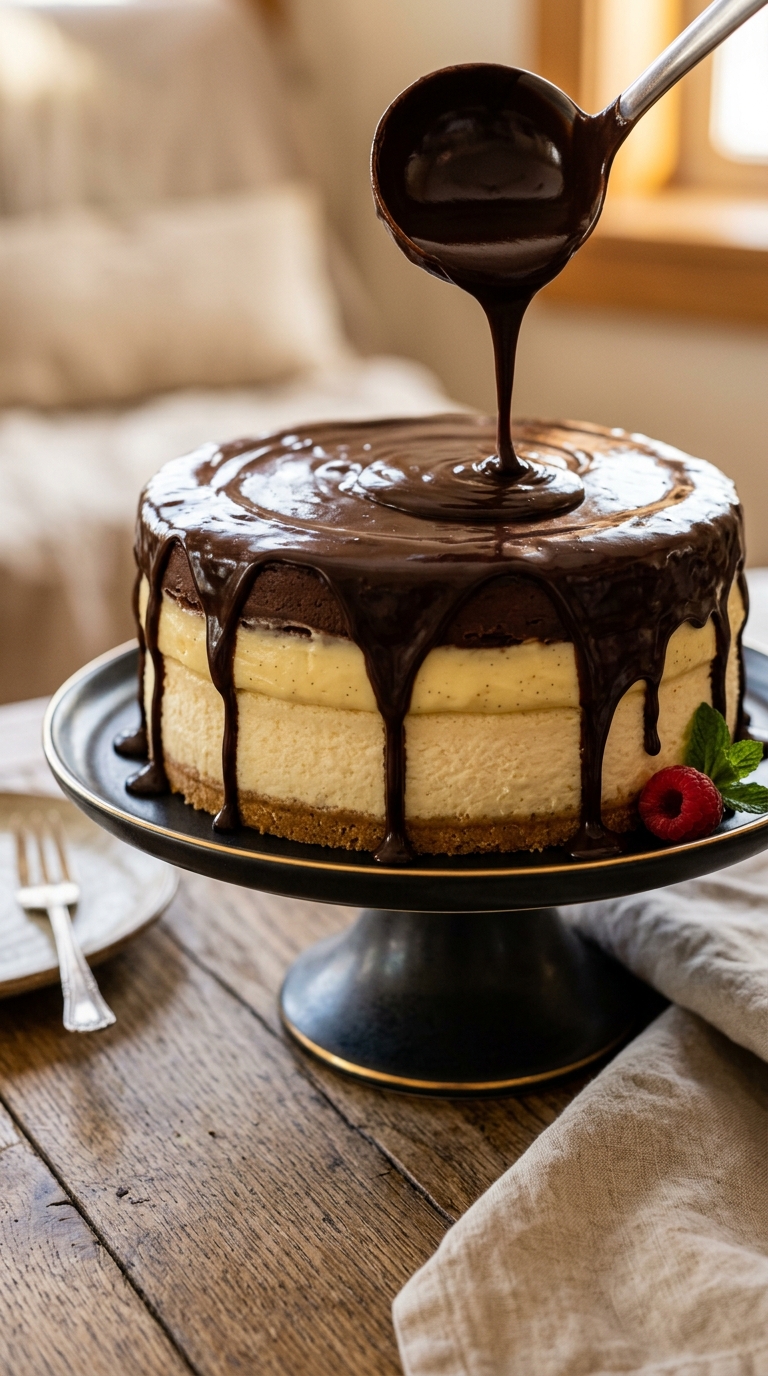
The finished slice should show distinct layers of vanilla cake, cheesecake, pastry cream, and chocolate.
That first forkful gives you soft cake, creamy cheesecake, silky custard, and rich chocolate at once. Honestly, what more could dessert ask for?
Tips for the Best Boston Cream Cheesecake
Use Room-Temperature Ingredients
Bring the cream cheese, eggs, and sour cream to room temperature before making the cheesecake filling.
Room-temperature ingredients blend more easily and help create a smoother batter. This small step can make a surprisingly noticeable difference.
Avoid Overmixing
Mix the cheesecake batter just until everything combines. Excessive mixing can incorporate unnecessary air.
Too much air can cause the cheesecake to puff during baking and sink afterward. A little patience saves you from staring at a sunken cheesecake later. :/
Cool Every Layer Properly
Do not rush the cooling process. The cake, cheesecake, pastry cream, and ganache each need the right temperature before you stack them.
Cold pastry cream and fully chilled cheesecake create cleaner layers. If you assemble everything while warm, the layers can slide around.
Chill Overnight When Possible
If you have time, refrigerate the cheesecake overnight. The flavors settle beautifully, and the texture becomes firmer and easier to slice.
This also makes the recipe perfect for entertaining. Prepare the cheesecake the day before, then simply slice and serve when your guests arrive.
Common Mistakes to Avoid
Even experienced bakers can run into trouble with layered desserts. Here are the mistakes I would avoid:
- Using cold cream cheese: It can create lumps.
- Overmixing the cheesecake: Too much air can cause cracks.
- Overbaking: A completely firm center usually means the cheesecake has gone too far.
- Adding warm pastry cream: It can soften the cheesecake layer.
- Pouring boiling cream over chocolate: Very hot cream can make the ganache greasy.
- Skipping the chilling time: You may end up with messy slices.
- Cutting with a cold, dull knife: Use a warm, sharp knife for clean layers.
How to Store Boston Cream Cheesecake
Store leftover Boston Cream Cheesecake in an airtight container or cover it tightly with plastic wrap.
Keep it refrigerated because the cheesecake and pastry cream contain dairy and eggs. Enjoy leftovers within 3–4 days for the best texture and flavor.
You can prepare the cheesecake base and pastry cream a day ahead. Keep both refrigerated separately, then assemble the dessert before serving.
I would avoid freezing the fully assembled cheesecake because the pastry cream can change texture after thawing.
How to Serve Boston Cream Cheesecake
This cheesecake already looks impressive, so you do not need elaborate decoration.
Try serving it with:
- Fresh strawberries or raspberries
- A small spoonful of whipped cream
- Fresh mint leaves
- Chocolate curls
- A light dusting of powdered sugar
For special occasions, serve smaller slices because this dessert packs plenty of richness. Your guests can always ask for seconds, which feels like a much nicer problem.

When to Make This Cheesecake
A Boston Cream Cheesecake works particularly well for occasions when you want a dessert that looks homemade but feels celebration-worthy.
Consider making it for:
- Birthday dinners
- Holiday gatherings
- Anniversary celebrations
- Dinner parties
- Sunday family meals
- Bridal or baby showers
- Weekend baking projects
It also makes a fun alternative to traditional birthday cake. The chocolate topping gives it a familiar appeal, while the pastry cream and cheesecake layers make it feel completely different.
Boston Cream Cheesecake vs. Boston Cream Pie
Both desserts share the same basic flavor combination, but their textures differ.
| Feature | Boston Cream Cheesecake | Boston Cream Pie |
|---|---|---|
| Main base | Cheesecake and vanilla cake | Sponge or yellow cake |
| Cream layer | Pastry cream | Pastry cream |
| Topping | Chocolate ganache | Chocolate glaze |
| Texture | Dense and creamy | Light and cakey |
| Best for | Rich dessert lovers | Classic cake fans |
Choose the cheesecake version when you want something richer and more substantial. Choose the traditional pie when you prefer a lighter cake texture.

Chocolate-Topped Boston Cream Cheesecake
12
servings45
minutes8
minutes300
kcalBoston Cream Cheesecake combines a soft vanilla cake base, creamy cheesecake, silky pastry cream, and glossy chocolate ganache. Bake the cake, add cheesecake filling, and bake until gently set. Cool and chill thoroughly, spread with pastry cream, top with ganache, then refrigerate again before slicing and serving.
Ingredients
Vanilla Cake
1 cup all-purpose flour
1 teaspoon baking powder
¼ teaspoon salt
½ cup sugar
¼ cup butter
1 large egg
1 teaspoon vanilla
⅓ cup whole milk
Cheesecake
24 ounces cream cheese
¾ cup sugar
3 large eggs
1 teaspoon vanilla
½ cup sour cream
2 tablespoons flour
Pastry Cream
2 cups whole milk
½ cup sugar
4 egg yolks
3 tablespoons cornstarch
2 tablespoons butter
2 teaspoons vanilla
Ganache
6 ounces semisweet chocolate
½ cup heavy cream
1 tablespoon butter
Directions
- Heat the oven to 325°F and prepare a 9-inch springform pan.
- Mix the cake ingredients and bake the vanilla base for 15–18 minutes.
- Beat cream cheese, sugar, eggs, vanilla, sour cream, and flour.
- Pour the cheesecake mixture over the cooled cake.
- Bake until the edges set and the center gently jiggles.
- Cool the cheesecake completely, then refrigerate.
- Cook the pastry cream until thick and silky.
- Chill the pastry cream completely.
- Spread pastry cream over the chilled cheesecake.
- Prepare chocolate ganache with hot cream and chopped chocolate.
- Spread ganache over the pastry cream.
- Chill for another 1–2 hours.
- Slice with a warm, sharp knife and serve chilled.
Frequently Asked Questions
Can I make Boston Cream Cheesecake ahead of time?
Absolutely. In fact, I recommend it. Make the cheesecake the day before and refrigerate it overnight. Add the pastry cream and ganache once the cheesecake has completely chilled.
Why did my cheesecake crack?
Cracks usually happen because the cheesecake baked too long, the oven temperature ran too high, or the batter contained too much air.
Bake until the edges set while the center still jiggles slightly. Avoid opening the oven repeatedly during baking.
Can I skip the water bath?
Yes, but the water bath helps maintain gentle, even heat. If you skip it, bake the cheesecake carefully and avoid overbaking.
You can also place a pan of hot water on a lower oven rack to add moisture without placing the cheesecake directly in water.
How do I get clean cheesecake slices?
Chill the cheesecake thoroughly first. Then dip a sharp knife in hot water, dry it, and slice.
Clean and rewarm the knife between cuts. This simple trick creates much cleaner layers.
Can I use store-bought pastry cream?
Sure. Homemade pastry cream gives you more control over flavor and sweetness, but a quality prepared custard can save time.
If you choose store-bought pastry cream, make sure it has a thick consistency so it stays neatly between the layers.
Can I use milk chocolate instead of semisweet chocolate?
You can, but milk chocolate creates a sweeter topping. I prefer semisweet chocolate because its deeper flavor balances the sweet pastry cream and rich cheesecake.
How long does Boston Cream Cheesecake last?
Store it covered in the refrigerator for 3–4 days. Keep it chilled until serving, especially because the dessert contains pastry cream.
Final Thoughts
This Boston Cream Cheesecake recipe gives you everything I want from a celebration dessert: creamy cheesecake, soft vanilla cake, silky pastry cream, and rich chocolate ganache.
The secret comes down to patience. Let every layer cool properly, chill the cheesecake thoroughly, and avoid rushing the assembly.
Once you cut that first clean slice and see all those layers, you will understand why the extra effort pays off. Make it for your next gathering, or simply make it because Tuesday deserves better dessert. 🙂
More dessert
See all
Strawberry Cheesecake With Homemade Berry Topping
Creamy cheesecake, buttery graham cracker crust, and juicy strawberries make a pretty unbeatable dessert combination. This Strawberry Cheesecake...

Sweet and Creamy Mango Mousse Dessert
Mango mousse tastes like sunshine in a dessert glass. It combines sweet mangoes, airy whipped cream, and a...

Lemon Mousse Recipe with Fresh Lemon Zest
Need a dessert that tastes fancy but doesn’t demand an entire afternoon in the kitchen? This Lemon Mousse...